Our best tips & tricks
Safety first
- Never leave burning candles unattended, and always keep them out of reach from children and pets.
- The quality in materials and production is important for the beauty of the candles, but in addition to beauty, quality also plays an important role in the safety of burning them. We ensure that our candles are of the best and safest possible quality, and we test each production batch for compliance with safety standards for sooting and fire prevention.
- The are a number of vendors out there, who sell vintage DANSK Tiny Taper candles – please note that candles in general do not age well, and may spark if too old. Especially if not stored properly, and we do know of a number of instances, where lighting these vintage candles have led to fires. So if you have bought or do buy those, please only use for display, do not light them! Buy ours for burning instead, they are newly made, have the same quality properties – and they will certainly be cheaper than having to replace inventory, a house, or having your insurance premium raised.
Tips for optimal enjoyment
- Since our Tiny Tapers are handmade, the bottom diameter may differ by +- 0.04-0.08″ (1-2 mm). If you find that the candles are to thick to fit the hole, they can be gently massaged into the candlesticks. They are made of several dipped layers and the layers will easily give way to make them fit. This can also be helped by use of a simple pencil sharpener.
If you find that they are too thin to fit securely in the hole, you may wrap a layer of tinfoil around the bottom to make them fit, or melt the bottoms into the holes, so they are secured.
- Trim the wick to 1/4″ (0.6 cm) before lighting. This also goes for if you blow them out, and want to relight them. If the wick is too long, the flame will be too big, and this may cause the candles to drip.
- Avoid draught – while they are dripless, our Tiny Tapers may drip if subjected to draught.
- Blow out your Tiny Tapers when 1/2″ (1,3 cm) above candleholder to facilitate easy cleaning.
Tips for storage
- Store in the box they came in, and preferably in a dark and chill environment to prolong lifetime.
- Do not put candles in the freezer – you may get a couple of minutes of extra burn time, however you risk cracking your Tiny Tapers.
Tricks for candleholder cleaning & maintenance
- The easiest way to clean out wax from your candleholder, is to preheat an oven to about 210°F (100°C), and place the candleholder upside down on a bed of 3-4 layers of paper towel, for about 20-30 minutes. While still warm, clean off any wax that has not been absorbed by the paper towel in the oven, with new paper towel. A cotton swab or q-tip can be used to get into those hard to reach cavities.
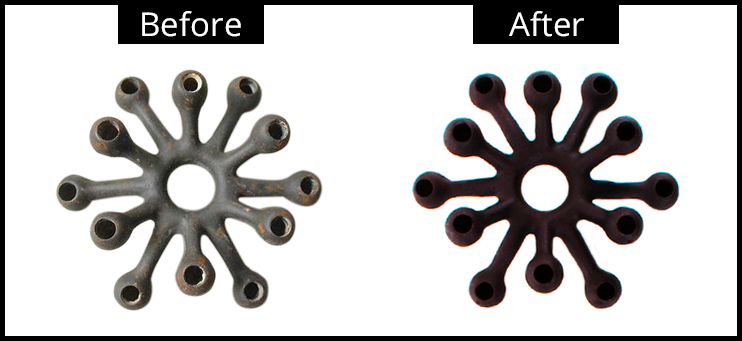
- Cast iron candleholders that have lost their deep black allure, can be made good as new after cleaning, by applying a thin layer of cooking oil, drying any excess oil off with a lint free cloth, and then curing for 30 minutes in a preheated oven at about 350°F (180°C).

- If a cast iron candleholder has surface rust, placing it a solution of 50% water and 50% white vinegar for a period of 1-3 hours can help remove the rust. Check progress every hour, so not to damage the cast iron itself. Clean off with cold water – and dry with a lint free cloth. Never use dishwashing soap on cast iron, as it may cause surface rust!
- Silverplated and brass candleholders should be polished with polishing agents made for the specific type of metal.
